You’ve just cooked a masterpiece or sat down at a trendy cafe, and the plate looks almost too good to eat. You pull out your smartphone, snap a quick photo, and… it looks flat, yellow, and unappealing. Sound familiar? Mastering food photography for beginners doesn’t require a bulky DSLR or an expensive studio. With the powerful cameras tucked inside our pockets today, anyone can capture mouth-watering images that stop the scroll on Instagram. By understanding light, composition, and a few “pro” smartphone tricks, you can transform a simple meal into a visual feast. Let’s dive into how you can take amazing food pics with your phone.
1. Find the Best Natural Light
Avoid using your phone’s built-in flash at all costs; it creates harsh reflections and unappealing shadows. Instead, set up near a large window. Soft, indirect North-facing light is the “gold standard” for making textures look rich and colors appear vibrant and true to life.
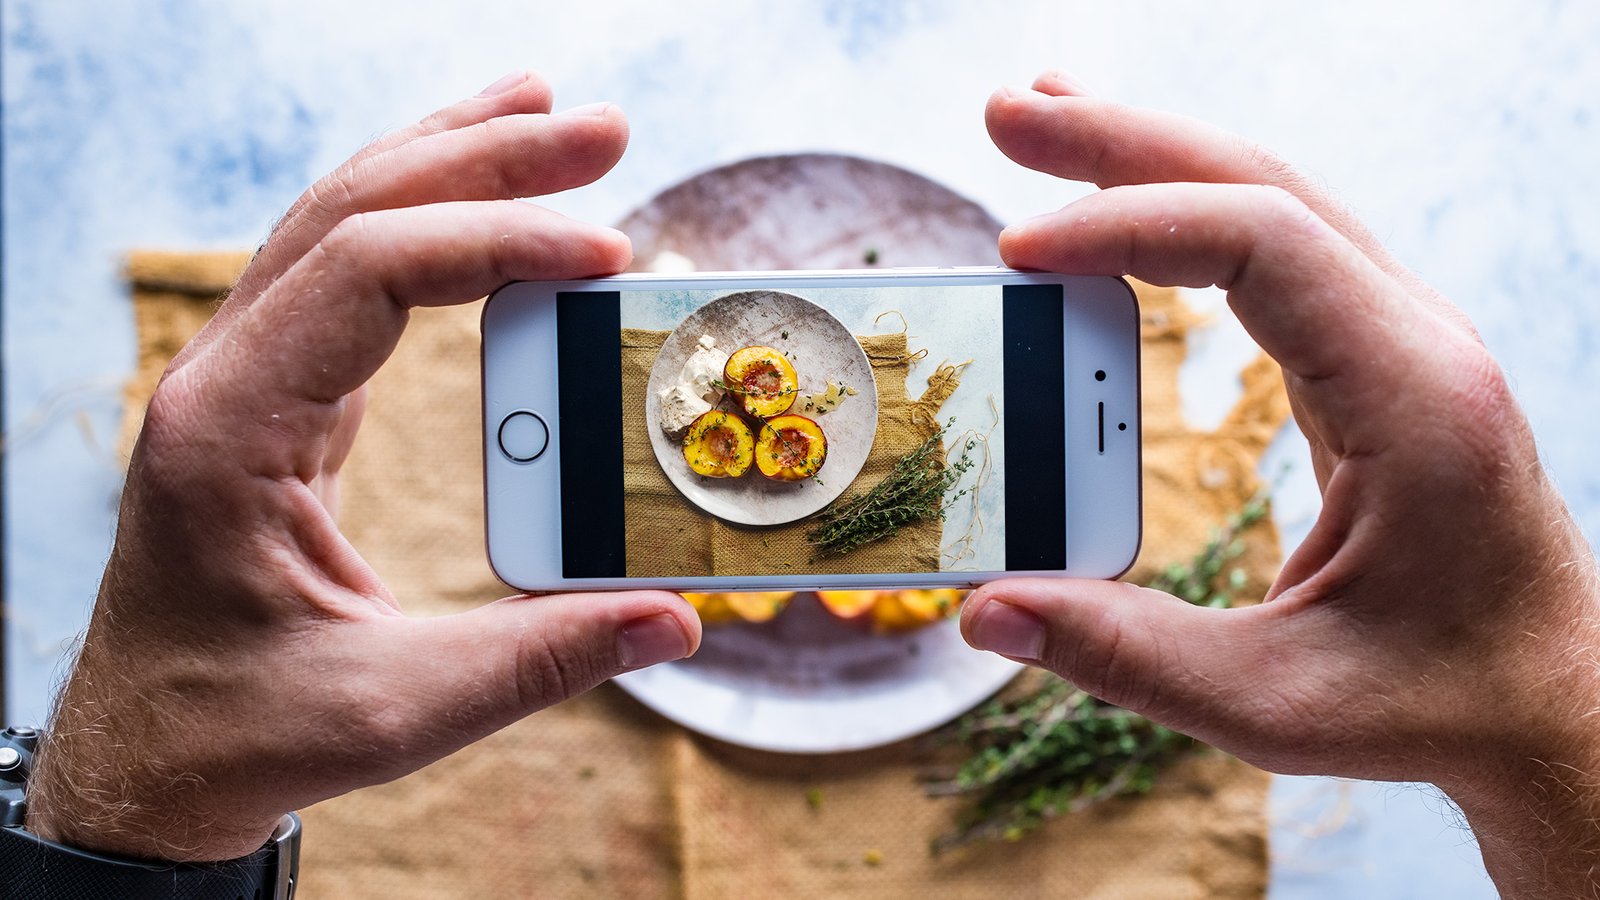
2. Master the Overhead “Flat Lay”
The flat lay is a classic for a reason. By holding your phone directly over the table, you eliminate distracting backgrounds and focus entirely on the geometry of the plates. It’s perfect for capturing a full spread or a beautifully decorated smoothie bowl.
3. Use the Rule of Thirds
Don’t always put your subject dead center. Turn on the grid lines in your camera settings. Place the main element of your dish at one of the four intersections. This creates a more balanced, professional composition that leads the eye naturally across the frame.
4. Adjust Exposure Manually
Your phone often over-brightens images. Tap the screen on the brightest part of the food and slide the “sun” icon down slightly. Lowering the exposure prevents “blown-out” highlights on shiny sauces or white plates, preserving the intricate details of the ingredients.
5. Wipe Your Lens
It sounds simple, but it’s the most common mistake. Our phones live in our pockets and hands, collecting grease and fingerprints. A quick wipe with a microfiber cloth—or even a clean t-shirt—removes the “haze” and instantly makes your food photos look sharper.
6. Embrace Negative Space
You don’t need to fill every inch of the frame with food. Leaving empty space around your plate—like a clean wooden table or a linen napkin—allows the viewer’s eyes to rest and makes the main dish pop. Less is often more in food photography.
7. Find the Best Angle
While overhead shots are great, some foods look better from a 45-degree angle. This mimics how we actually see food while sitting at a table. Use this for “tall” foods like burgers, stacked pancakes, or layered cakes to show off their height.
8. Use “Portrait Mode” Wisely
Portrait mode uses software to blur the background (bokeh), making the food stand out. It works best for single items like a cocktail or a cupcake. Be careful, though; if the blur looks “fake” around the edges, dial back the aperture settings manually.
9. Style with Fresh Ingredients
Raw ingredients used in the recipe make excellent props. Scatter some fresh herbs, a few peppercorns, or a wedge of lemon around the plate. This tells a story about the flavor profile and adds organic shapes to an otherwise static shot.
10. Incorporate a Human Element
A hand reaching for a fry or pouring syrup adds life and “action” to a photo. It makes the scene feel more authentic and relatable. If you’re shooting alone, use your phone’s timer and a small tripod to capture the perfect pour.
11. Watch Your White Balance
Artificial indoor lighting often makes food look sickly yellow or blue. If the colors look “off,” use a basic editing app to adjust the “Temperature” or “Warmth.” You want your whites to look white so the food colors remain appetizing.
12. Focus on Texture
The crunch of a crust or the creaminess of a sauce is what makes people hungry. Get close—but not too close—to capture these details. Use the “Macro” mode if your phone has it to highlight the salt crystals on a warm pretzel.
13. Use Neutral Backgrounds
Bright, busy patterns can distract from the meal. Stick to neutral tones like grey stone, dark wood, or matte white. These backgrounds act as a canvas, allowing the natural colors of the vegetables and proteins to be the stars of the show.
14. Depth of Field with Layers
Place a glass of water in the background and a fork in the foreground. Creating “layers” gives the photo a three-dimensional feel. Even with a phone, having objects at different distances from the lens creates a sense of professional depth.
15. Edit, Don’t Over-Filter
Avoid the heavy, pre-set filters on social media apps. Instead, use apps like Lightroom Mobile or Snapseed. Focus on subtle adjustments to contrast, saturation, and sharpness. The goal is to make the food look like the best version of itself.
16. Tell a Story with Props
A crumpled napkin, a vintage spoon, or a glass of wine can suggest a cozy dinner or a bright brunch. Choose props that match the “vibe” of the food. A rustic loaf of bread looks better on a wooden board than a plastic tray.
17. The Power of Color Theory
Think about the color wheel. Green garnishes look incredible on red tomato sauces because they are complementary colors. Using contrasting colors makes the dish visually “vibrant” and more likely to grab attention in a crowded social media feed.
18. Avoid Digital Zoom
If you need to get closer, move your phone physically. Using digital zoom lowers the resolution and makes the image grainy. For the highest quality, always shoot at the native focal length and crop the photo later during the editing process.
19. Capture the Steam
Hot food looks most delicious when it’s actually hot. If you’re shooting at home, have your camera ready before the plate hits the table. Capturing a faint wisp of steam can make a photo feel incredibly fresh and inviting.
20. Practice Patience
Great food photography is a result of trial and error. Take multiple shots from different heights and angles. Sometimes the best photo is the one you took when you shifted your chair just two inches to the left to catch the light.
SEO Meta Description
Learn food photography for beginners and take amazing food pics with your phone. Master lighting, composition, and editing tips to create professional food blog photos.
Focus Keywords
- Food photography for beginners
- Smartphone food photography
- How to take food photos
- Food styling tips
- Mobile photo editing
FAQ Section
Q: Why do my food photos look yellow? A: This is usually caused by indoor “warm” light bulbs. Try shooting in natural daylight, or adjust the “White Balance” or “Temperature” setting in an editing app to cool the image down.
Q: Do I need a tripod for phone food photography? A: While not strictly necessary, a small tripod helps in low-light situations to prevent blur. It is also essential for capturing “action” shots like pouring sauce or dusting powdered sugar.
Q: What is the best app for editing food photos? A: Snapseed and Lightroom Mobile are the top choices. They offer granular control over colors and brightness without degrading the quality of your smartphone images.
Internal Linking Suggestions
- 10 Easy Food Styling Props You Already Have in Your Kitchen
- The Best Lighting Setups for Home Cooks
- How to Edit Food Photos for Instagram: A Step-by-Step Guide
Conclusion
Improving your food photography for beginners skills is a journey of observation. By focusing on natural light, clean compositions, and subtle editing, you can produce stunning images that do justice to your culinary creations. Remember, the best camera is the one you have with you. Keep experimenting with different angles and textures, and soon your phone’s gallery will be filled with professional-quality food art. Would you like me to suggest a specific color palette for your next shoot?
Leave a Reply